Within our bathroom range, we stock a broad variety of shower panels – these include PVC wall panels, laminate wall panels and also our tile effect wall panels.
From the three, both PVC and laminate are well known options, however our tile effect wet wall has become the most popular choice amongst those looking for a classic tile look but with the benefit of a shower panel.
In this latest blog post we will be explaining this new modern alternative in further detail and what is has to offer your bathroom.
What is a tile effect bathroom panel?
Tile effect is the name given to any wall panels that take inspiration from classic tile designs and give the impression of a traditional grout line across the surface of the board.
Our own tile effect collection offers brick, mosaic, plain and classic designs to choose from in varying colour and marble effects.
Supplied as one full sheet, the slightly raised 3D surface offers a timeless look for your bathroom, that not only looks great, but also has insulation benefits over standard tiles.

What are tile effect wall panels made from?
Tile effect wall panels are made from a compact grade laminate core – a slimline 3mm mixture of resin and decorative craft papers compressed together via heat.
It is then a press plate which is used to create the traditional grout line design on the panel’s surface to give it’s authentic appearance.
This structure is 100% waterproof.

How do you install a tile effect wall panels?
Applicable over existing tiles or other surfaces, so long as the wall as flat, the installation of our wall panels is incredibly easy and can be carried out by any DIY enthusiast, taking only a matter of hours to complete a full wet room.
Using our Versatile internal trims, begin in one corner of the room and build out your bathroom or shower area from here.
All that is required is grip adhesive to the back of the panel and silicone sealant within trims to provide a secure and water tight seal.
For further information regarding cut outs and other details, please refer to our detailed tile effect bathroom panel fitting instructions.
How do you clean a tile effect wall panel?
Once installed, there is no heavy cleaning regime required for our tile effect bathroom panels.
Unlike traditional tiles, they do not require grout maintenance, instead just a simple wipe down with a damp cloth and mild detergent will keep them looking at their best.
Their non-porous surface prevents the build-up of any material, meaning soap and residue can be easily rinsed off.
And there you have it, the main benefits of our tile effect panels.
Providing you with the look of tiles and a sophisticated grout line, minus the maintenance headache.
Stocked within each of our showroom locations, we ensure quick delivery within two to ten working days of your order being placed online.
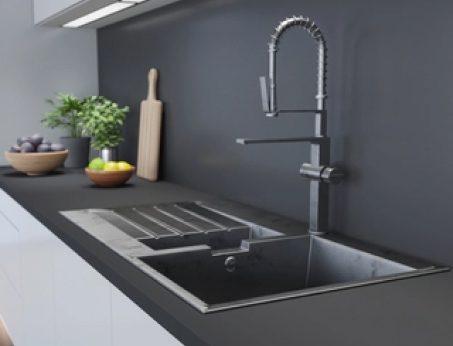
Providing you with the high gloss finish of glass, with premium performance characteristics, acrylic splashbacks are growing to become one of the most popular surface choices for a kitchen splashback.
They provide a perfect alternative for those looking for something a little different to traditional laminate splashback designs, but just what makes them such a great addition to your home?

Extensive colour options
When it comes to colour, acrylic has a lot more to offer by comparison to a glass splashback and they can achieve a much higher gloss sheen than laminate.
Our own Zenolite offer has a full range of eight coloured acrylic finishes for our customers to choose from, ranging from white and neural options to navy blue and khaki green shades.
This means, that whatever look you intend to have for your kitchen, we are sure to have a design that suits with this contemporary finish.

25x the impact resistance of glass
All of our acrylic kitchen splashback surfaces are entirely impact resistant, meaning if in any instance they are dropped, they will not shatter.
This makes them the ideal material for more intricate kitchen wall applications, as your coloured splashbacks can be easily stored and have minimal risk of damage!
And, for added peace of mind, they are certified with 6H scratch resistance.

Easy to install
Supplied in landscape 2600mm x 760mm x 4mm format, you can easily install any acrylic sheet within a matter of minutes with the assistance of grab adhesive.
Simply sand down the sides to create polished edges and make use of our colour match silicone sealant in corner areas.
Up to six times faster than tiles, they cover one full kitchen wall area seamlessly, minimising any obstructions caused by joining trims.
Meanwhile cut outs can be easily made with standard DIY tools to create a specific shape on the acrylic splashback surface.
However we do not suggest to use the material behind gas hobs, as we cannot determine it’s performance with different models.
Instead aluminium is better suited to these areas.
Click here for our full acrylic kitchen splashback installation guide.
Minimal effort to maintain
Another of our product’s many benefits includes its minimal maintenance requirements.
Once installed just a simple wipe down with a damp soft cloth and warm soapy water will keep your acrylic kitchen splashback looking like new.
Full details of their chemical resistance and cleaning recommendations can be found within our acrylic kitchen splashback maintenance guide.

Versatile applications
100% waterproof, our coloured acrylic surfaces are also perfectly suited for use as bathroom splashbacks, behind sink areas.
And, for larger wet room applications, we also stock a range of Zenolite acrylic shower panels in-store.

Feeling convinced on purchasing an acrylic splashback for your kitchen or looking for more information regarding our acrylic shower panel offer? Get in contact with our customer service team via sales@rearo.co.uk or phone 0141 440 0800 should you have any questions.
Our Zenolite coloured acrylic splashbacks are held in stock within each of our branches and are available for despatch. Our standard delivery time is within two to ten working days of your order being placed.
Modern kitchen ideas and imagery are often attributed to larger open plan spaces, however there is nothing to stop a small kitchen taking on this style.
You may not have the ability to add in a free standing kitchen island, due to limited floor space, however you can take advantage of open shelving and additional storage.
These are just some of the suggestions you can use to take on a modern kitchen aesthetic in your home. Read on and allow us to show you that your style choices should not be determined by the square footage of your kitchen.
Keep your living space minimalist
When it comes to modern small kitchen ideas, most stick to a minimalist monochromatic palette or neutral base shade like beige or tan when it comes to choosing a colour scheme.
We would suggest using our Grigio Alpaca worktop or White kitchen worktop.
Accessories should then be restricted to prevent taking up any precious counter space, ensuring your surfaces play a prominent role in the look you are trying to achieve for your kitchen.
However acceptances can be made for the essentials, like a coffee machine or toaster.

Opt for vibrant and natural lighting
Your fresh palette should then be complemented with as much natural light as possible, this soft look will bring out the best in your space.
Keep window spaces open and avoid heavy curtains or blinds, instead utilise fresh linens or mesh fabrics, allowing fresh air to easily enter your home.
However, for a more dramatic finish we would suggest strategically placed LED lights to create a real statement.
Create extra storage with custom cabinetry
Wall cupboards then become the next talking point of any compact space.
If we are telling you to remove clutter from your worktops and take advantage of natural light, understandably, your next question is – where will I put everything?
Our response is to build upwards when it comes to your wall cabinets. Create a third or fourth mezzanine layer or create open shelves if you still have some items you feel the need to display.
This will provide more space but also still keeps with the neat aesthetic of a modern and minimalist kitchen.
Adopt a smart living approach
The clue is in the name, a modern kitchen space will adopt all of the latest quirks and gadgets!
Whether it’s handle free kitchen cabinets, touch sensor appliances or a precision oven, you are sure to be at the forefront of any technology developments.
That is why we recommend our Fenix kitchen worktops for your kitchen counters.
Extremely opaque, these soft to the touch laminates bounce light for a unique matte finish, which can also be repaired from any superficial micro scratches.
A simple application of heat will trigger its thermal healing response – if that doesn’t trigger your high tech ethos, we don’t know what will!
So there you have it four key things you should be considering if you are looking to create a modern small kitchen.
Should you require any further information relating to our worktops, kitchen splashbacks, upstands or matching breakfast bars, please make sure to get in touch with a member of our customer service team.
Our staff are on hand Monday to Friday via sales@rearo.co.uk or phone 0141 440 0800.
Shower panels offer a stylish alternative to a traditional tile offer for any bathroom renovation.
Whether you’ve opted for tile effect panels, pvc panels or laminate bathroom wall panels, we know you will be wanting to keep them looking at their best.
Although a quick and easy product to care for, there are some things to consider when it comes to cleaning and maintenance, depending on the finish you have opted for.
Read on to find out more.

Confirm whether you have completely waterproof shower panels
Although all of our shower wall panels surfaces are completely waterproof, the core differs between each range and this is what can affect their performance against water ingress.
Our Ancona pvc shower panels, Nuova range and also our Versatile range are completely waterproof – however Selkie Board is bonded to a wood based core and so any moisture is likely to cause damage such as delamination or ‘burst’ the panel. This is why the product is marketed as a waterproof system, as it has to be installed using our panel trims and colour match silicone sealant for a watertight seal.
Therefore it is vital that you follow our installation guide and use all the suggested products when fitting our product.
In similar vein, although our other shower panels are made from 100% waterproof material, necessary accessories must be used to protect the wall area to which they are applied.
Prior to using your panels in wet areas, post-installation you should be inspecting the silicone seal between your boards and along the shower tray to ensure you have a watertight finish.
If you are not confident in the look of this, we would encourage you to re-seal before rinsing over your surfaces with a shower head or damp cloth to remove dust/ wood residue.
Caring for your wall panels
Thereafter you can regularly clean and maintain your wall panels with just a damp cloth and mild detergent to remove any soap residue or other materials.
Our personal recommendations include products such as cif or Dettol multi surface cleaner.
And for a thorough clean on textured shower wall panels or tile effect shower panels, you should introduce a soft bristle brush – ideal for getting in between any grooves.
How do I remove moisture residue from my wet wall shower panels?
Although the above cleaning methods are very effective, some matte finish laminate shower panels can leave behind streaks in smaller, more humid bathrooms.
We recommend to use a non-abrasive vinegar based cleanser, such as windolene, to get rid of this.
Simply spray directly on to your shower panels and then wipe dry with kitchen towel.

What can I do for stains on my laminate shower panels?
Another issue that can occur is staining by hair dye residue or similar products. Laminate wall panels and pvc shower panels are non-porous in nature, however the pigment in such items is what can cling to your bathroom walls.
Timing is key when it comes to repairing this issue, bring down the intensity of the staining as much as possible by rinsing with a shower head, thereafter apply a product like Cillit Bang leave for a maximum of 20 minutes and rinse.
Repeat this process until the stain no longer exists.
And, there you have it, a quick and easy guide for the best ways to clean and maintain your shower wall panels. Should you require any further information, check out our documentation page for each ranges fitting and maintenance guides.
For further information regarding wall panels, please get in touch with a member of our customer service team via sales@rearo.co.uk or phone 0141 440 0800.
Our kitchen worktops are provided as a ready made item. however there are some finishing steps required on our customer’s part to complete the look of your chosen product.
This involves covering the exposed short ends on your worktop.
However, don’t be too concerned, it’s actually a quick and simple method.

Why do I need to cover the edges on my kitchen countertops?
We understand that sometimes it may look aesthetically pleasing to expose some of the inner chipboard core on your kitchen worktops, however their is justification behind why you are asked to cover your exposed short ends after cutting the lengths of your worktop.
Chipboard is wood based and so it does not agree well with water, it will naturally absorb any water and as a result expand/ burst – a process known as water ingress.
Once the moisture has got in to your laminate worktops, the damage is irreversible and you will have to replace them.
What are laminate edging strips?
Cut from the same decorative laminate sheets used to create your kitchen worktops, edging strips are rectangular offcuts which will be used to cover the exposed chipboard on either end of your countertop.
Dimensions will depend on each supplier, however they will typically sit between 1m and 2m in length and will match the thickness of your kitchen worktops.
Where can I buy worktop edging strips?
We at Rearo provide edging strips as standard with our extensive selection of kitchen worktops, however if you require any additional lengths, these can be requested through our showroom network or buy them online.
Click here for additional kitchen worktop edging strips.

Installing edging strips on your kitchen worktops
To attach your edging strip to your chosen work surface, you will require either a Unika Mitre Pen Kit or worktop adhesive tape.
Begin by measuring the length of your kitchen worktop and then cut your edging strip to size.
Attach using your preferred method as outlined above and follow the instructions as outlined on the product packaging.
Then, using a stanley blade, trim the strip to match your work surfaces.
Finish by filing or using sandpaper, to create a small radius between your laminate edging strips and kitchen worktop for a neat and professional look.
Maintenance of your laminate worktops
Once completed, your kitchen worktops will be entirely water resistant and thereafter, the only maintenance required will be a simple wipe down with a damp cloth and mild detergent.