Finding yourself in love with the look of a certain laminate surface for your kitchen walls, to then only notice that it is a shower panel?
Not to worry, it is actually quite possible that your chosen product could be used for kitchen applications too.
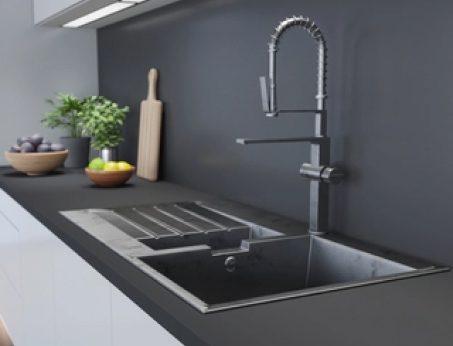
When shopping with Rearo, all of our laminate shower panels are certified with a class 2 fire rating, meaning our bathroom wall panels are perfectly capable of meeting the requirements of a kitchen splashback and can be applied directly behind hob areas.

Which of your shower panels can I use in my kitchen?
This includes our Selkie, Nuova and Versatile ranges – all of which offer an extensive mix of authentic stone and wood effects, as well as pantone finishes and tile designs.
Unfortunately though, these traits do not extend to our pvc shower panels – which do not meet the criteria for a kitchen setting.
Their class 1 fire rating means they are prone to melting under significant heat exposure.

How to apply laminate panels to your walls
However not to worry, as the application process for using our wet wall shower panels as kitchen splashbacks is both quick and straight forward.
For a seamless finish, all that is required is some grip adhesive, silicone sealant and also h-section panel trims – used to join panels together when exceeding a certain length.
Although, if you are looking to avoid using trims, a tongue and groove join could be the perfect alternative.
Unfortunately this process is not possible with our Versatile tile effect shower panels. This is why we offer our white tile splashback – perfect for horizontal applications.
Click here for our full kitchen splashback installation guide.
Caring for your new splashback
Once installed, only minimal maintenance will be required to keep your new kitchen walls looking like new.
Just a simple wipe down with a damp cloth and mild detergent will remove any residue, such as cooking spillages and water.
Our laminates non-porous means it is less likely to stain, whilst also being scratch resistant.
And, for added satisfaction, all products are supported by a 10-year guarantee.
Has the spring bank holiday gave you some time to think? Have you become inspired by a new butcherblock or white worktop, and now you’re considering taking on your latest kitchen refurbishment by yourself?
The prospect of installing your own laminate worktop may seem quite daunting, however in this blog we plan to provide you with a step by step guide on how to fit a kitchen worktop – making the process both quick and easy.
Step 1: Remove your existing laminate worktops
The first step in fitting any new work surface is to remove your old worktop – ensuring minimal damage to any cabinets already in place, as well as splashbacks, if these items are staying in situ.
Working from the underside of your laminate worktops, begin by removing any existing screws and fittings holding your current surfaces in place to your kitchen cupboards.
Once sitting loosely, then separate your laminate worktops from your walls, splashbacks or upstands by scoring through any silicone sealant with the assistance of a Stanley blade.
This should then allow your existing worktop to be removed freely.

Step 2: Measure your new kitchen worktops
With this area now clear you can begin the process of fitting your new surfaces, starting by measuring your required worktop length.
Butt your laminate worktop(s) against your kitchen walls, forming a 90 degree angle if using more than one, then marking out any cutting lines using a pencil.
Your new worktop(s) can then be cut to size using standard woodworking tools.
We advise you to always refer to our installation guide for information on whether to cut with your décor face up or down.
At this stage you would also then determine whether you would be utilising worktop trims or a mitre to join your laminate worktops, again marking out either a 45 degree angle or straight edge to suit.
Other items to consider include sink and hob cut outs.

Step 3: Joining & securing your laminate worktops in place
When ready, you can then begin the process of securing your laminate worktops to the underside of your kitchen cabinets, with the help of brackets and round-headed screws. Always referring to the manufacturer’s instructions.
If using more than one kitchen worktop, then surfaces should be joined prior to being secured.
Thereafter exposed edges and cut outs would then be sealed using our Colorfill colour match silicone sealant for a watertight finish.
Step 4: Finish raw edges using a laminate strip
Now that your kitchen worktop is in place, there is just one last step required to achieve a professional look – finishing the edge of the worktop.
All of our kitchen worktops are supplied with matching laminate strips, which provide the perfect way to cover any exposed raw edges on either of your work surfaces short ends.
Full details of which can be found in our blog post regarding how to edge a kitchen worktop.
