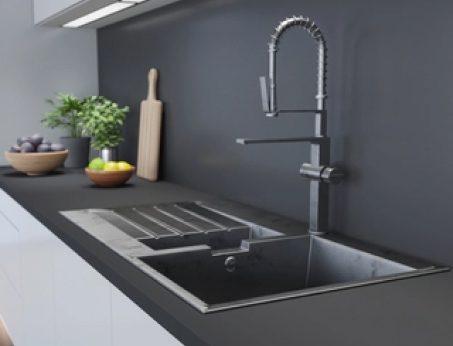
The long awaited summer season has finally arrived, those late evening strolls and mild temperatures, coupled with the occasional barbeque – it makes for the perfect season. But, have you spared a thought for those laminate worktops in your kitchen?
Increased heat exposure, direct sunlight and a higher risk of staining (barbeque sauce, we’re looking at you) all play a role in affecting the appearance of your work surfaces.
However, fear not, this short and simple blog will cover the key things you should be doing to protect your worktops this summer – starting with sun exposure.

Reduce UV exposure to your work surfaces
UV rays can have a damaging effect on your laminate finishes, with direct light eventually causing ‘bleaching’ or colour change over time.
That is why we recommend in the summer months to introduce a soft mesh curtain, or similar material, to window areas to create a barrier between your laminate worktops and the sun.
By doing so, you are still taking advantage of the natural daylight in your kitchen, but ensuring the longevity of your chosen wood effect or marble surface.

Never cut directly on to laminate kitchen surfaces
And as well as sun exposure, food preparation is another area where due care needs to be taken.
Our square edge work surfaces may look like the perfect place to start chopping up those onions, but sharp knives can permanently scar your laminate worktops. And only our thermal healing Fenix worktops have the ability to repair superficial micro scratches.
That is why you must always use a chopping board to protect your surfaces.

Clean stains and spillages from your worktops as soon as possible
And finally, although naturally water resistant and non porous, prolonged exposure to certain spillages can result in staining of your kitchen worktops.
Therefore it’s always important to clean up as soon as possible. Just a simple wipe down with a damp cloth and mild detergent will keep your laminate surfaces looking like new.

And there you have it, the three top tips you should be applying in your home this summer to ensure your beautiful laminate worktops stay like new!
Traditionally our bathroom wall panels have been seen as just that, a cladding solution for your shower areas or wet room, however there is nothing to stop you using these ranges for dry applications too! We supply them for commercial applications for this exact purpose.
Quicker than tiles and more cost effective than marble stone or real wood finishes, they provide a neat and professional looking surface that will stand the test of time.
Something which our customer, Laura Gilmour (@home_bylala), decided to take advantage of in her first home refurbishment – creating a TV feature wall using our Selkie Palazzo wall panels.
And following the response and amount of questions we’ve had on social, you have all been loving it as much as us! So much so, we have decided to create this short step by step guide to instruct you on how to create your own.

Choosing wall panelling for your living room
From our range of wall panels, we would advise customers to use either our luxury Selkie or Nuova wall panels for use in living areas or bedrooms. Reason being, our PVC and tile effect options can be cold to the touch and can be affected by direct sunlight.
Across both of these ranges you will have a choice of 40 décors – including marble and wood effects, as well as statement pantone shades.
Free samples are available on request directly via the product pages.

Measuring for your wall panel
Once decided on your décor of choice, you will then need to measure up the area you are looking to cover, to allow you to know how many panels you will need.
In most instances one panel (2420mm x 1200mm x 11mm) should be enough to cover, however for longer stretches or taller areas you may need to purchase two.
Using your tv unit as a guide, grab some tape and measure the width you would like your panel to cover and then the height to which you would like your boards to sit.
If you’re finding it hard to envisage, then marking the area out with a pencil or chalk is a great option and can be easily wiped clean.

Choosing the core and finish for your wall panels
Next step will be choosing your core and finish.
Our Nuova panels only have one core option, whereas Selkie panels are available in either plywood or MR MDF, however both can be finished with either a square or tongue and groove edge.
Square edge panels are the best option for this kind of installation, only when joining two panels together would you need tongue and groove wall panels.
Regarding core, any option is great, all offer the same aesthetic and durability – although MR MDF does have a slightly cheaper price point.

Installing your new feature interior wall panel
If like Laura, you plan to fit your flat screen over your wall panels, you will need to make all cuts and insertions for wiring etc prior to the panel being placed on to the wall.
We recommend measuring twice before taking any action on the panel.
Once happy with your alterations, wall panels can then be applied directly over your existing wall coverings and held in place using our panel adhesive.
We would also recommend some neatly placed screws in each corner to secure in place.
And, for a neater looking finish, you can always cover exposed edges using our end cap trims once your panel has been installed.
If you follow us on Facebook or Instagram, we’re sure you’ll have been inspired by the recent kitchen post we featured from our customer Melissa (@home_bym_fxx), which included a hand crafted, free standing kitchen island using own Senses White Yule breakfast bar worktops.
After an influx of questions from our followers on how to create their own, it felt only fitting that we crafted a handy step by step blog for reference amongst the keen DIY enthusiasts.
And it’s not as complicated as you may have previously thought!

Defining a freestanding kitchen island
Firstly let’s clear up what exactly a kitchen island is. By definition it is the modern replacement for the traditional breakfast bar concept, however unlike a breakfast bar, a kitchen island typically stands freely in the middle of the room.
It is then down to the user whether its main function is to provide additional seating, extra storage or further food preparation space.
Due to their size, they are typically more common within larger kitchen spaces because of the width of the work surface.
So always make sure to measure up before investing in any tools!

What tools will you need to make your own island unit?
However, if you find you have the space to accommodate your own, then lets get started.
You will require two/ three breakfast bar worktops depending on your height preference, a hand saw or circular saw, joining brackets, biscuit joints, screws and wood glue to carry out your install.

How to put together a kitchen island structure
Once you have all your tools gathered you would determine your preferred island height and cut two separate supporting walls from one of your breakfast bar worktops to suit.
Thereafter you would create a 45 degree angle within top of both cut ends (one sloping to the left and one to the right) and repeat to the underside of your un cut breakfast bar worktop – allowing them to meet at an L shape when joined together.
When happy with the join, you can then secure in place with wood glue and biscuit joins, focusing on one side at a time and securing below with joining brackets.
After giving time for your kitchen island to dry you can then decide whether to add storage facilities and secure in place. It is important to note that base cabinets will make it a lot easier to secure your freestanding kitchen island to the floor.
Finally sand of your sharp edges lightly, being careful to not damage the laminate edge.
An entire kitchen renovation may seem a little daunting at the moment, with the current rate of inflation and the time associated. However, small amendments can still have a lasting impact on your home.
Simply swapping out your flooring or kitchen worktops can completely transform the look of your kitchen space. But just where do you begin when working with existing colours and accessories?
We sit down with our Design Team to ask the key things you should be thinking when buying new vinyl flooring to update your room.

What is vinyl click flooring?
So first things first, a little clarity on what vinyl click flooring actually is – it’s key selling point being the product structure.
Unlike standard laminate flooring, vinyl floors are made from a synthetic material blend (wear layer, print layer, core layer & built-in underlay) and are 100% waterproof – meaning they are ideally suited to bathroom and kitchen areas.
Thicker by comparison, our luxury Luxury vinyl flooring comes in a plank or tile format, with authentic stone and wood effect finishes that interlock side-to-side to form a floating floor
Offering hassle free installation, our lvt flooring can be easily cut using a stanley blade and does not require any adhesive.
Should I use luxury vinyl tiles or planks for my kitchen?
These above benefits apply to both our plank and tile flooring, so really your decision is more design and taste based.
Traditionally, tiles have always been the preferred flooring option for kitchens – due to the associated spillages etc. during food preparation. However with luxury vinyl, you can achieve an authentic wood effect finish from our planks and benefit from its waterproof properties.
In regards to design, tiles would be considered the more modern style option, whereas planks would be regarded as traditional – most commonly used in rustic, country inspired homes.
However they can also look great alongside minimalist colour schemes and have the ability to give the impression of length in smaller kitchen spaces.
What colour should I choose for my vinyl flooring?
If you’re also debating on which colour to use, always split your room in to a palette (colour swatches are great for this) and from there decide on complementary patterns, shades or finishes.
You should be thinking about whether you want a statement piece when it comes to your click flooring or if you would rather the focus is on another area – such as your splashbacks.
Personally, we would recommend our Jura Carrara Marble flooring for those looking for a little definition.
And, if you’re entirely stuck, our Black Slate click vinyl flooring and light concrete luxury vinyl floor tiles are extremely versatile options which go with virtually any colour palette.